Using Adafruit IO with WoTT Credentials
Introduction
Adafruit IO is a free cloud service interested in making IoT accessible to everyone through presenting data in a useful and user-friendly way. Services that they provide include linking your IoT devices to Twitter and weather services. You can also use Adafruit IO to monitor and control temperature sensitive devices; or to change the colours of an RGB lightbulb through their user-friendly dashboard. These are just a few examples of how you can utilise Adafruit’s IO.
We’re interested in Adafruit IO as it provides a means for us to communicate with our IoT devices via messages through either an MQTT or HTTP service. WWe can therefore interact with Adafruit’s services and use our WoTT provided credentials to secure it.
For this example you will need a device with the WoTT agent installed and a browser. You will also need an Adafruit IO account as well as a WoTT dash account. We will show you to set these up later in the guide if you haven’t done so already.
This example contains code snippets. To access these, clone our examples repository by doing the following:
$ git clone https://github.com/WoTTsecurity/examples.git
Alternatively, you can use curl and download the relevant files. Instructions included for both.
Installing and setting up to use Adafruit IO
The first thing you will need to do, is to sign up for Adafruit IO so you can access their dashboard. Familiarise yourself with their basic guides. For this example, we will be creating a ‘Feed.’ First however, you will need to have the Adafruit IO client downloaded on your system. We will be using their Python client.
To install:
$ apt update && apt install -y python3 python3-pip curl
$ pip3 install adafruit-io
Now we’re all set up, we can create a feed to later call via MQTT.
Creating a Feed for MQTT messaging
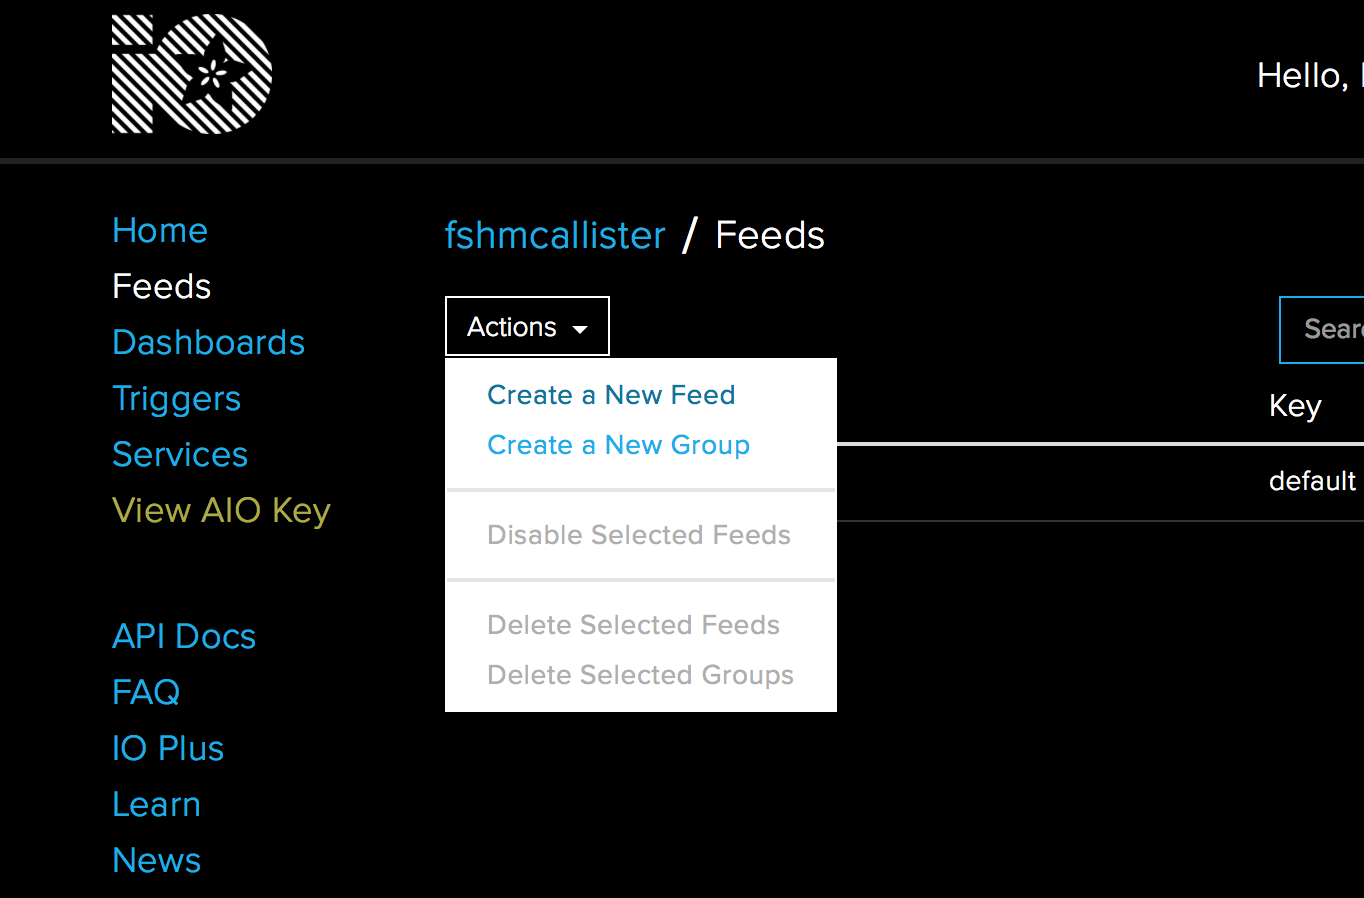
Login to the Adafruit IO dashboard. Navigate to the ‘Feeds’ page on the left-hand side menu. Hover over actions and select ‘Create a New Feed.’ The feed acts as a channel or datastream through which your device connects to Adafruit IO. We are going to create a feed that is called via MQTT. In other words, the feed becomes the topic from which messages are published/subscribed to.
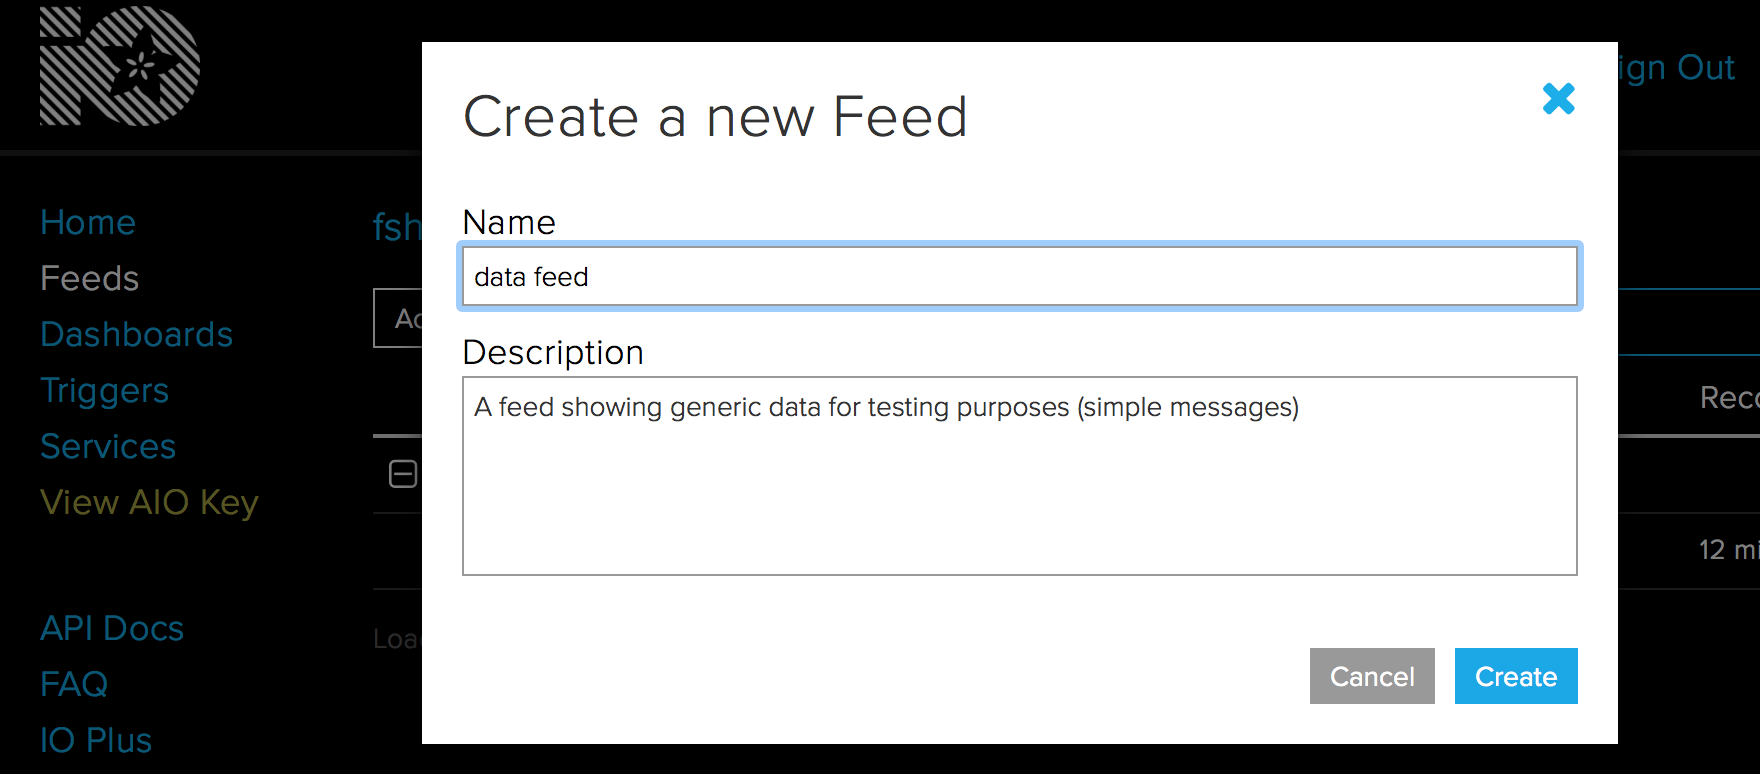
The feed name refers to the type of data you are observing- for example temperature or humidity. To keep things simple, we are just going to observe data and name the feed ‘data feed.’ The description is supposed to provide some more in-depth information about the feed. When using sensor data, this is going to be something like temperature or humidity, however for this exmaple we are just dealing with very basic pub/sub messages, so our data type is generic.
Note: it is possible to create the feeds using a simple python application. If you prefer a more codified style of set up, you can follow this guide.
Creating credentials in WoTT dash
In order to call the Adafruit API via HTTP access, it requires a key. You can find this key on the left-hand side of your Adafruit dasboard as you did with ‘Feeds’ under AIO key. You will be brought to a page akin to this:
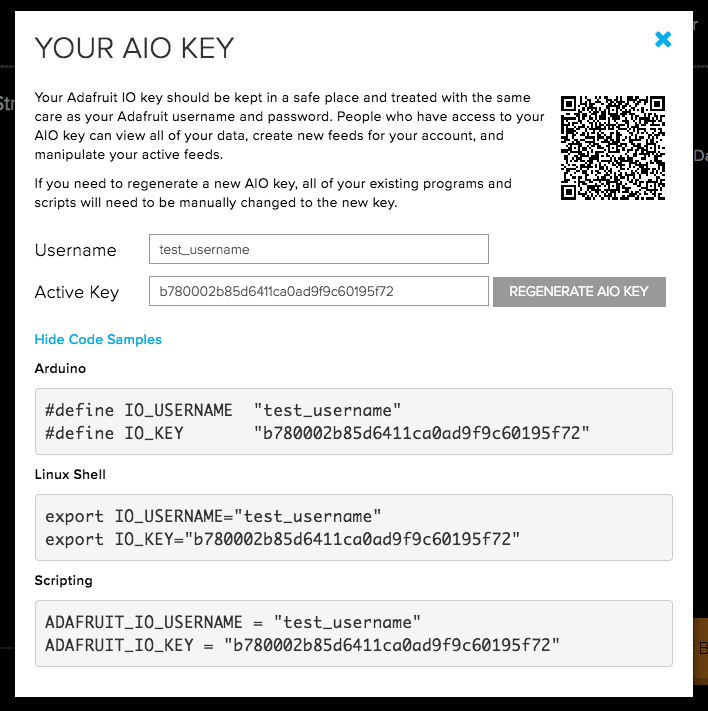
These are your unique Adafruit details. We can add these to WoTT’s dashboard as a new credential where the value is your personal username followed by the Active Key value. To do so, you will need to login or create an account for the WoTT dash.
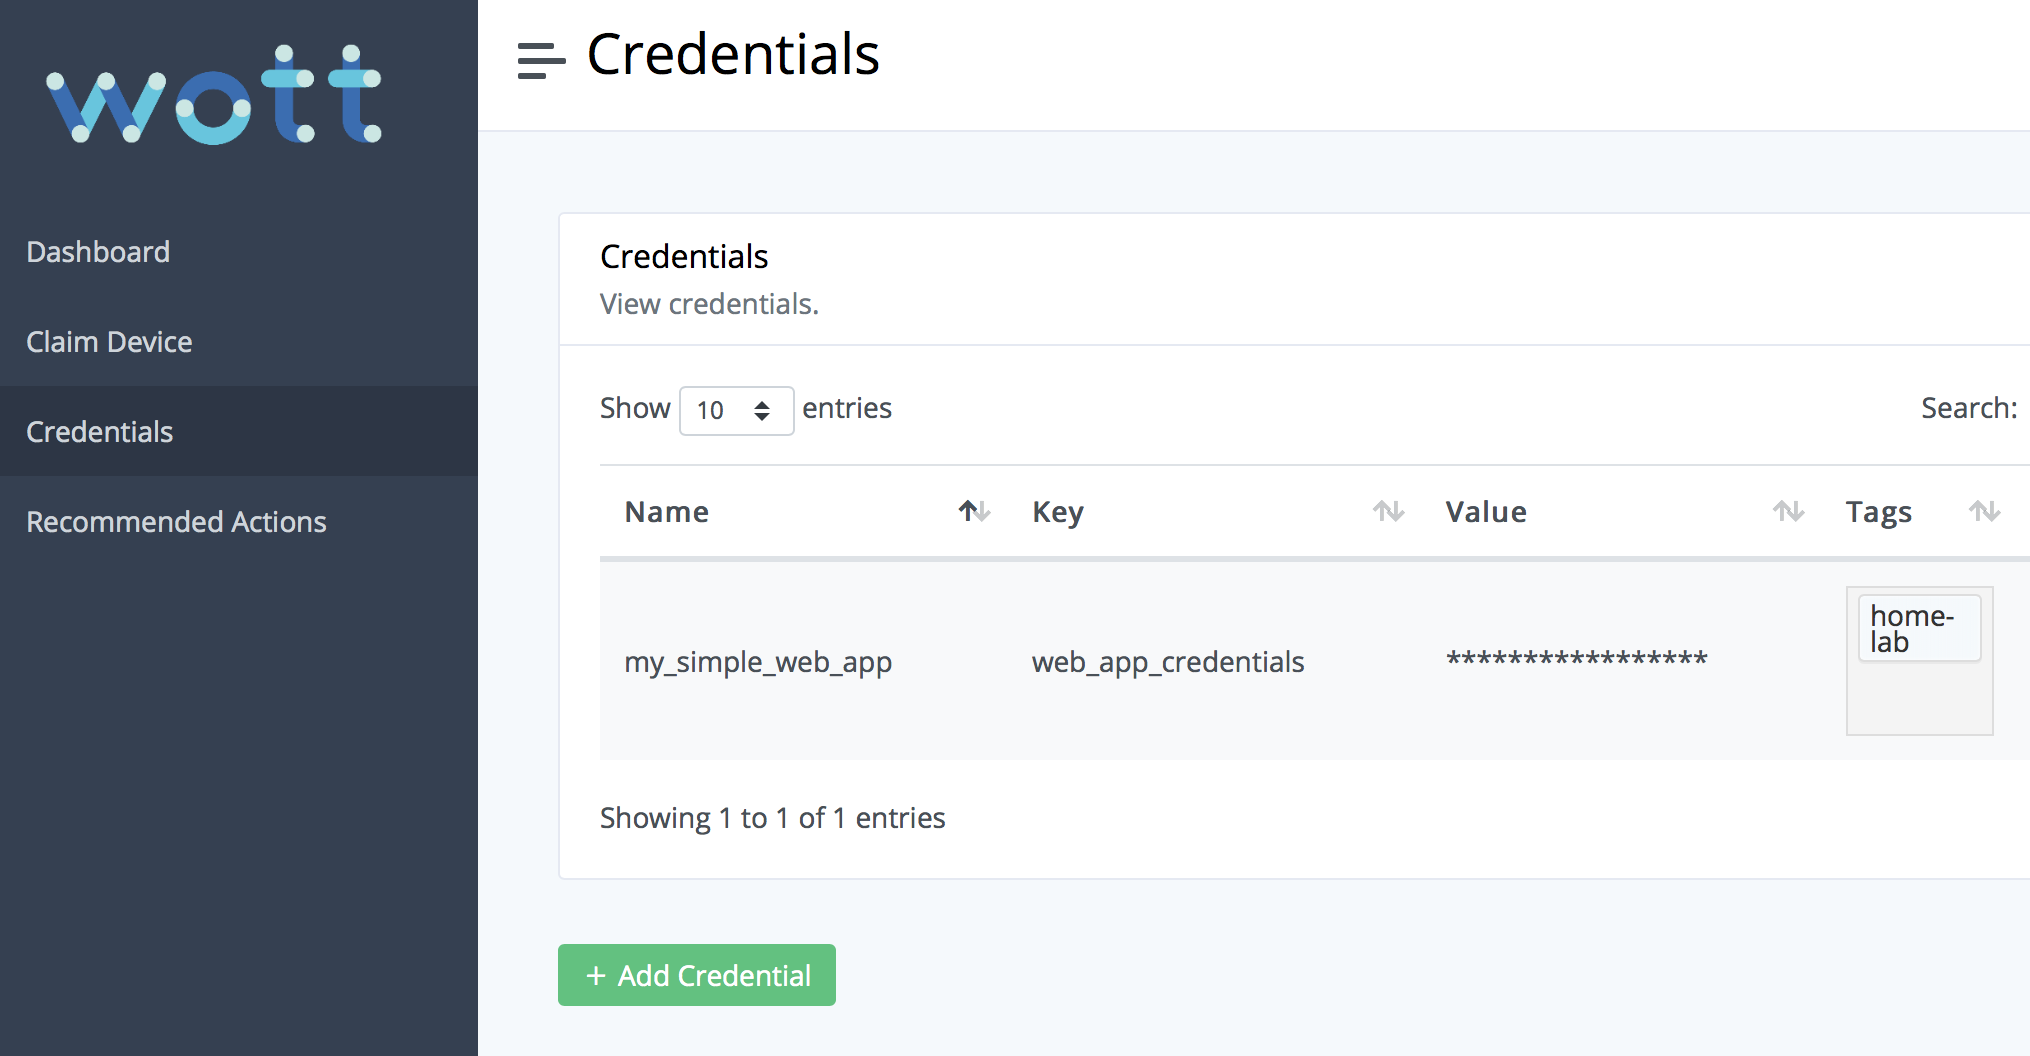
If you already have the WoTT dash and have registered your devices, you can skip ahead to inputting the credentials of the device. Otherwise, register your WoTT agent device to the dash by obtaining the Device ID and Claim Token by doing the following commands on said device:
$ sudo wott-agent whoami
$ sudo wott-aget claim-token
and pasting the output into the ‘Claim Device’ segment of the WoTT dash. This device is now claimed and registered to the WoTT dash. You can view the list of your claimed devices on the main dashboard. Navigate to your newly registered device and add a new tag, adafruit to it. Through these tags, WoTT identifies which devices specific credentials are intended for.
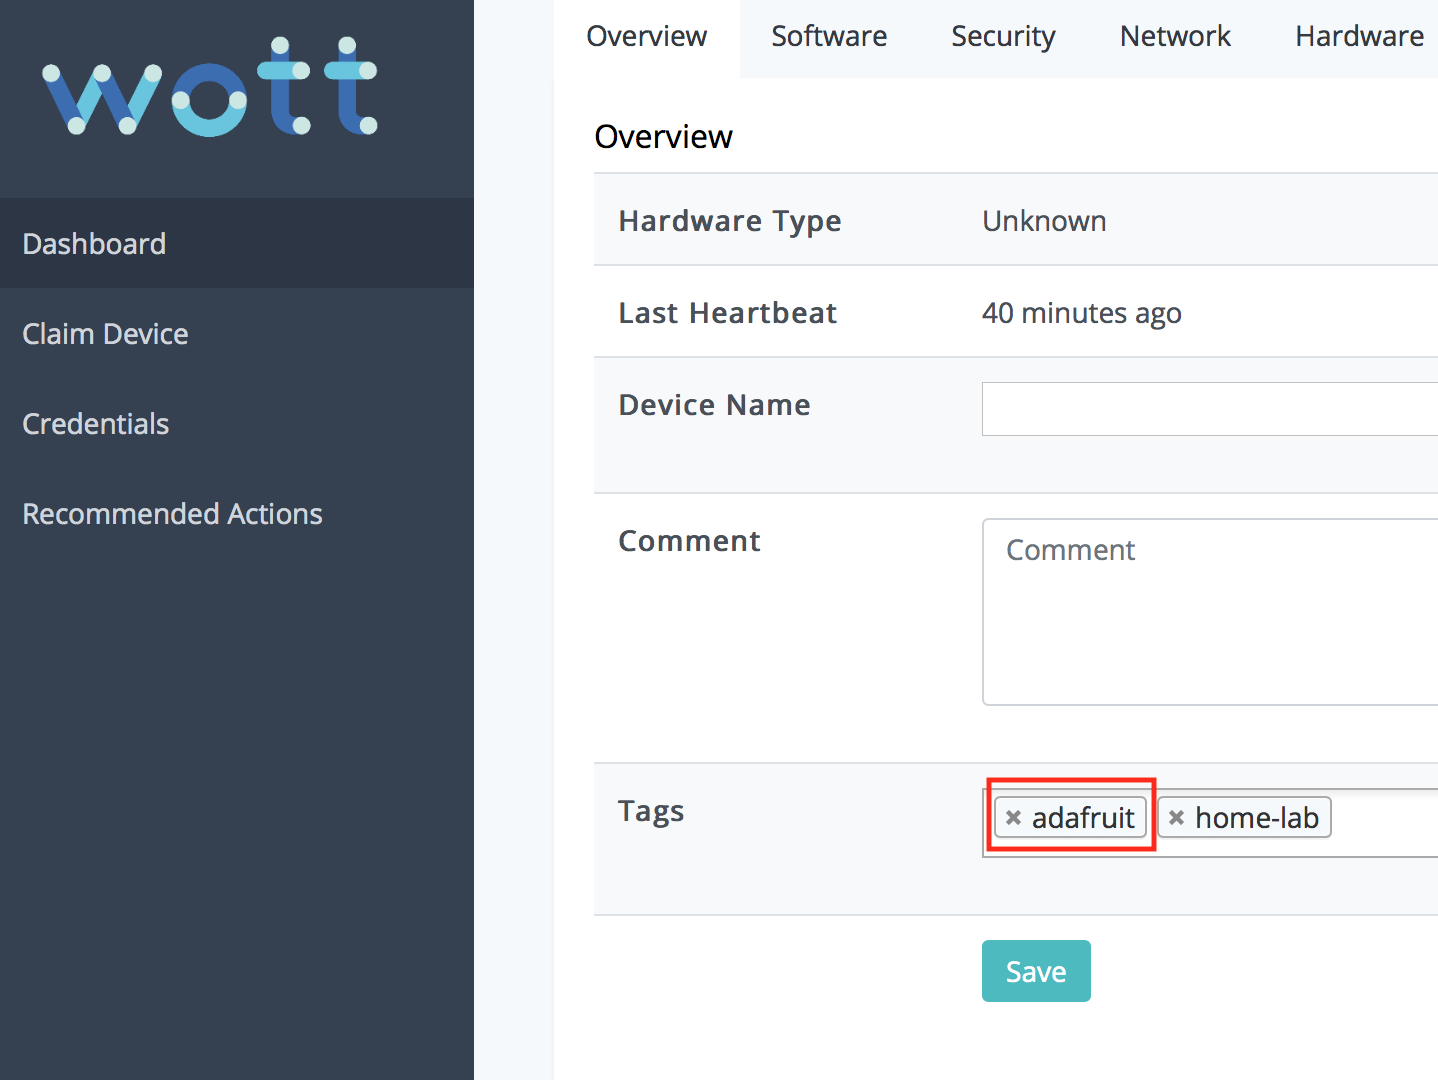
Now that we are all set up, we need to create the credentials with the Adafruit information. Navigate to the ‘Credentials’ page of the WoTT dash and a new credential. Input the following into the fields:
Name = adafruit_aio
Key = credentials
Value = username:key
Tags = adafruit
using your relevant information from the Adafruit AIO key.
Note the adafruit tag here. Ensure that the device you will be downloading the credentials on has a matching tag.
To download the credential, restart the WoTT Agent by running:
$ sudo service wott-agent restart
There will now be a JSON file on your system containing your credentials.
Setting up Adafruit feed sharing with an MQTT Client
We have included a modified example of the Adafruit feed sharing tutorial in this guide which utilises WoTT’s credentials rather than hard coding your details into the application. To run the example using curl:
$ mkdir ~/wott-adafruit-mqtt-example
$ cd ~/wott-adafruit-mqtt-example
$ curl -o mqtt_shared_feeds.py https://raw.githubusercontent.com/WoTTsecurity/examples/master/adafruit-io/mqtt_shared_feeds.py
$ sudo python3 mqtt_shared_feeds.py
If you have our repository cloned instead, navigate to the examples directory and do the following instead:
$ cd adafruit-io
$ sudo python3 mqtt_shared_feeds.py
If you are successful, you should receive a message like so:
Publishing a new message every 10 seconds (press Ctrl-C to quit)...
Publishing 96 to data feed
Connected to Adafruit IO!
Publishing 12 to data feed
Feed data feed received new value: 12
Publishing 52 to data feed
Feed data feed received new value: 52
[...]
On your Adafruit IO dash, you should see the data being received on your feed:
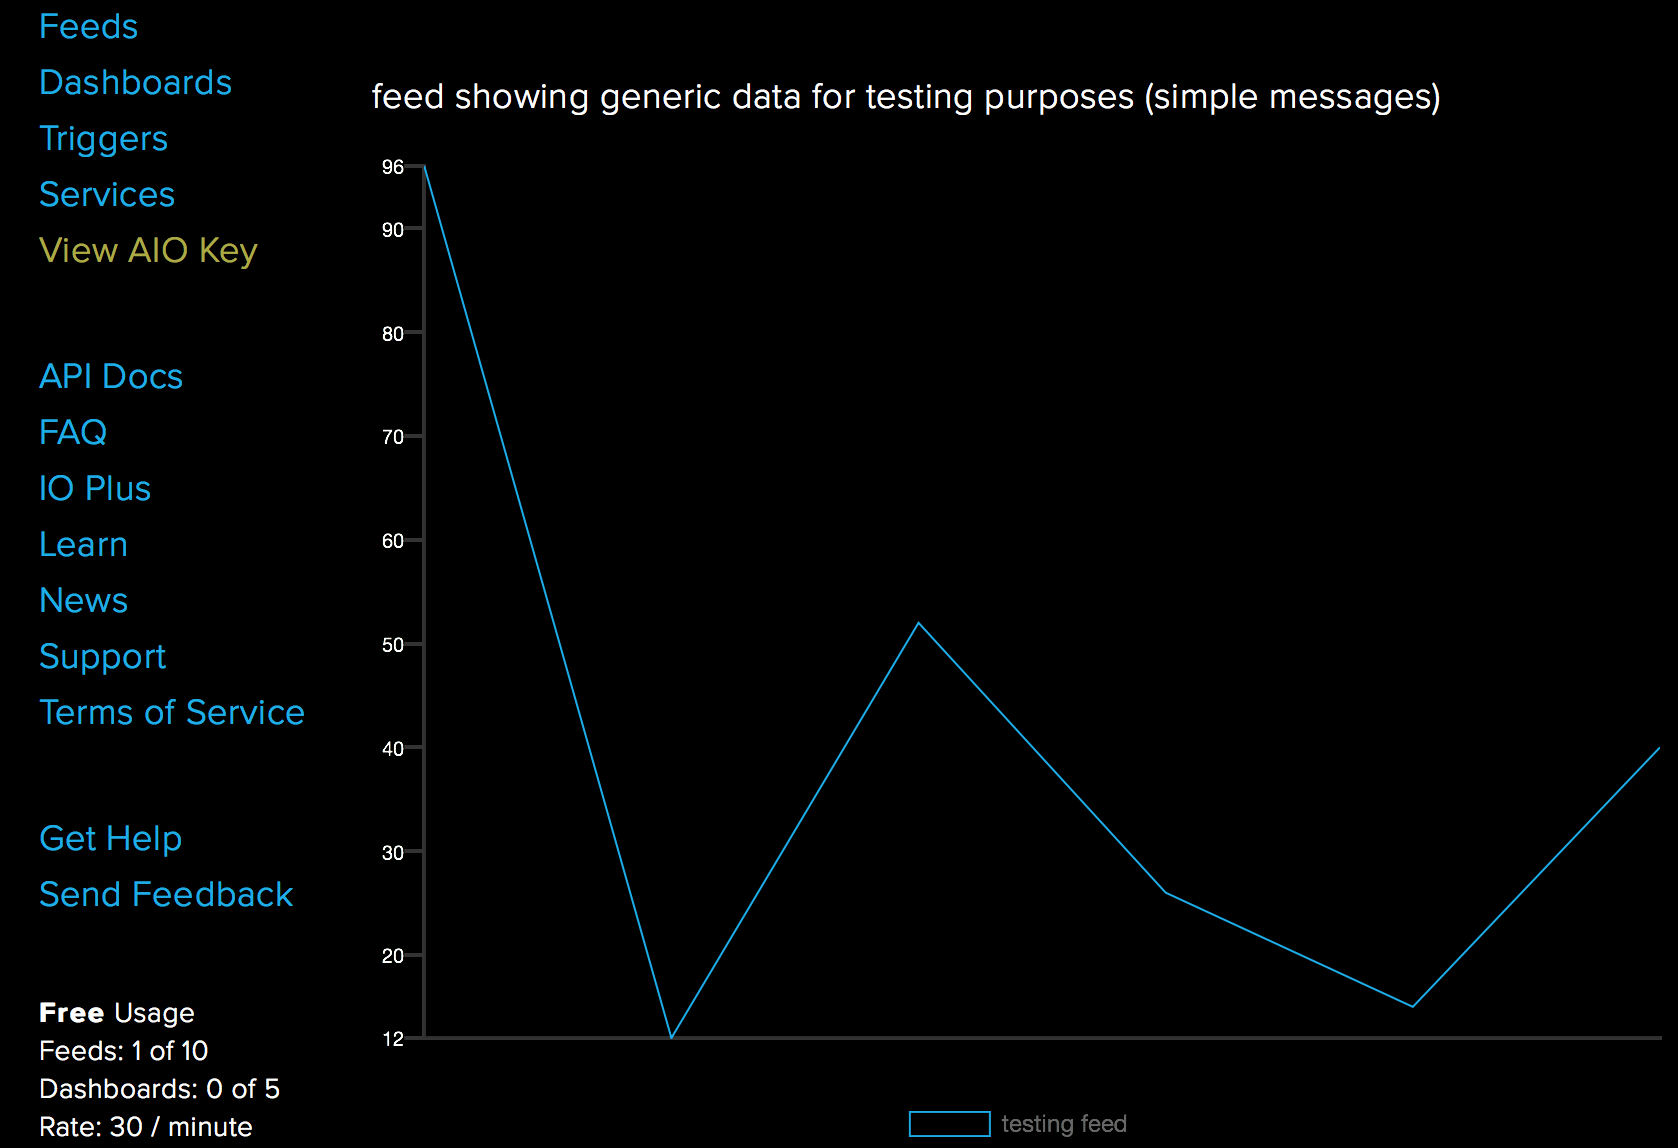
Note: your values will be different to this example as they are randomly generated, use the above as a reference point only.
Common errors
Adafruit IO Python uses Python 3. If you have both a version of Python 2 and Python 3 on your machine, you will need to use the appropriate commands (for example pip vs pip3).
No module named Adafruit_IO
File "/Users/user/dir/app_dir/mqtt_shared_feeds.py", line 10, in <module>
    from Adafruit_IO import  MQTTClient
ImportError: No module named Adafruit_IO
This happens when Adafruit IO is not installed correctly. The reccommended fix is to manually install Adafruit IO into the directory that you are working in (wott-adafruit-mqtt-example).
Closing notes
We have successfully used WoTT credentials to secure access to your Adafruit IO feed through an MQTT client!
The Python application contained in this example is a modified version of Adafruit IO’s own MQTT feed sharing example. Feel free to edit, play with, and modify the app as you choose. Note that if you make changes to feed names, feed owners, etc; you will have to change this within the app (or within WoTT credentials to be more secure).
Ensure that if you do add additional credentials to WoTT dashboard that you restart the WoTT agent to download the credentials immediately- otherwise WoTT will fetch the information every 15 minutes.
And while you're here...
Did you know that WoTT gives you free security audits, including CVE scanning, for your first node? Sign up today.