Introduction
Note there are some tutorials within this article. These vary in difficulty. All require a linux distribution to be compatible with our agent.
Cybersecurity is an ever-growing, ever-complicating field. As a new developer, it can be daunting to think of where to start. Here we’re going to talk a little about mTLS and why you as a developer should care about it (and implement it!).
mTLS is just an extension of TLS (Transport Layer Security). This is commonly found in verifying endpoints and for encrypting communications and for TLS specifically, browsers. The ‘HTTPS’ in a URL is the evidence for this. This part of the URL verifies the identity of the server (the website you’re accessing), to you the client.
Unlike a password which is manually entered by a single user, TLS is typically managed by cryptographic certificates. Most TLS protocols usually verify this with an x509 certificate; and it’s typically the client requesting a valid certificate from the server (DNS name on server must match that of the certificate). Secure Sockets Layer (SSL) security is also based off this principle and HTTPS is its successor.
The main thing that makes mTLS different (and arguably more secure) is that it requires both the server and client to verify each other: a handshake. This is particularly useful in a scenario where you are the server and not the client. Ultimately it’s flexible and lightweight making it perfect for edge devices.
This might still seem a bit overcomplicated. At WoTT we have our own dedicated Certificate Authority and examples of using the CA to secure mTLS connections. We encourage you to try it out to familiarise yourself with the concept. Additionally, our agent is lightweight and can be used flexibly on servers and other edge devices.
How to implement mTLS: some tutorials by WoTT
There are actually several different ways to implement an mTLS style security layer for security. We have several examples for you to try and implement yourself of varying difficulties.
Easy
We have a very simple to implement tutorial showing how you can use mTLS to secure a basic Web Application using WoTT’s agent as a manager. See here for more details.
Medium
If you’re familiar with Nginx servers, we have a useful tutorial to help guide you through setting up mTLS on it using our CA. See here.
Hard
(Recommended after following Nginx tutorial) you may want to up the ante if you have a Kubernetes cluster you want to secure. If you want to dive into securing Kubernetes with mTLS using WoTT, go here.
The important thing to take away is that you need a Certificate Authority from which to configure your system to. WoTT provides one for you. All these examples are designed to be adaptable so feel free to modify them at your will. If you don’t feel a particular need to know how mTLS actually works, feel free to just skip to the end or explore the rest of WoTT. We have several other articles on how to use our agent with your system.
How it works
After all that you may still be interested in how mTLS actually works.
First of all, mTLS is configurable. It is up to the server and client to decide which certificates are considered ‘trustworthy.’ In the examples that we provided, we set up the system in a way to trust only WoTT provided certificates; but you absolutely can modify this to include other CA provided certificates. It is up to the developer’s discretion.
But how does it actually work? We’ve mentioned already the ‘handshake’ as a concept, but this is actually the name given to the technology TLS uses. The TLS handshake protocol can be found here but it’s long and wordy. What’s important to know is that the TLS protocol is part of a layered structure and is sat between the transport (also known as TCP) and application layers.
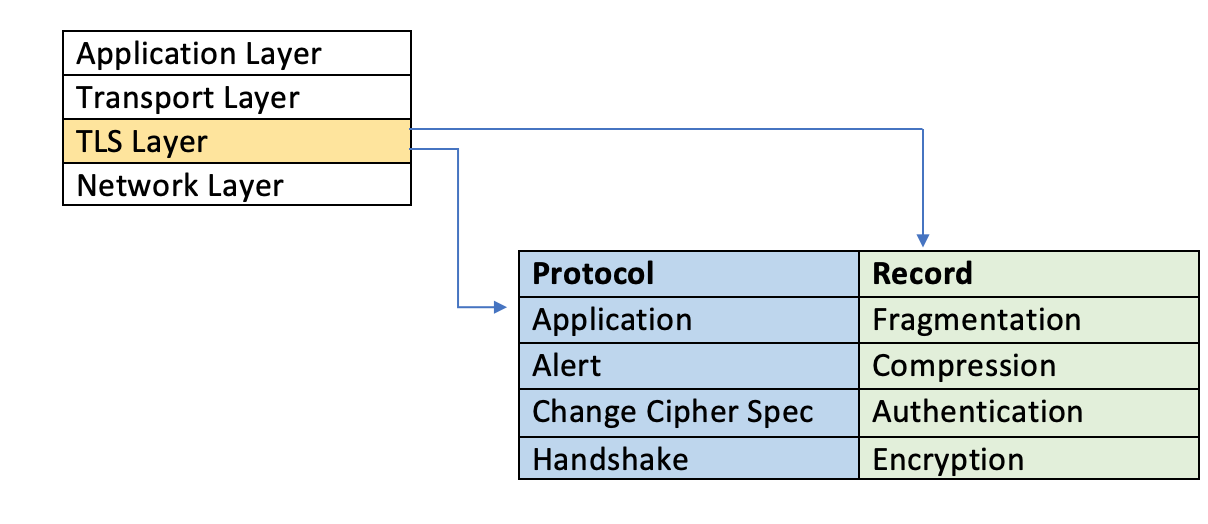
The protocol/handshake layer is where the cryptographic ‘magic’ takes place. It manages the encryption algorithm used (also known as cipher) and public key exchange which is contained within a certificate. This certificate is signed for by a Certificate Authority and is what gives an endpoint its cryptographic identity. Basically, the server being accessed has an associated x509 certificate from a CA which is exchanged in this handshake protocol. This certificate contains information regarding the server’s name, its public key, and a ‘signature.’ This is why we often refer to this as ‘digital signage.’
The certificate is then verified by each endpoint according to its signature which is the provider of the certificate, the CA. With mTLS, it’s the exact same except both the server and client verify each other so each endpoint has an x509 certificate. You can think of the CA as vouching for a device’s identity.
The actual components of a certificate are determined by a greater structure called PKI (public key infrastructure). PKI is a set of tools that allows for you to encrypt or digitally sign data as with certificates. Within the PKI architecture includes the Certificate Authority which is a trusted third party that signs off on a digital certificate. General services are often signed for by a public CA which will verify any user. As we’ve said before, WoTT has its own CA but WoTT’s CA is private ensuring that only recognised users are signed for.
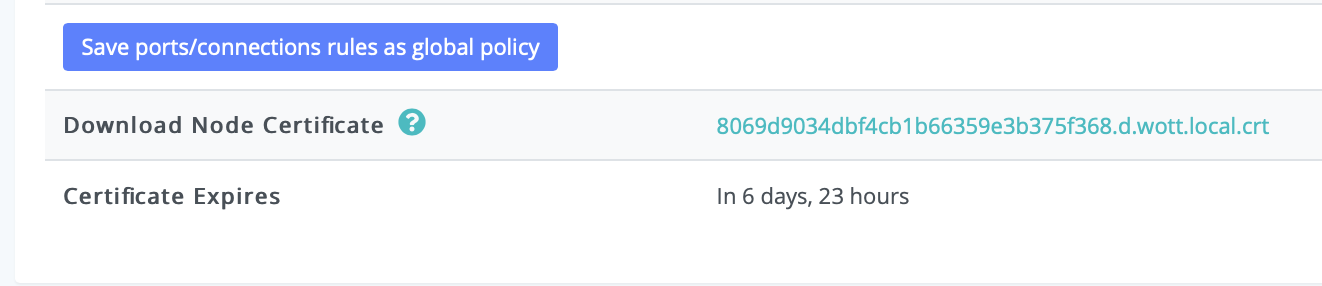
Therefore, WoTT uses a PKI structure in order to generate key components of our certificates. At WoTT, we assign each device a unique WoTT ID. This is publicly available in your WoTT certificate that is downloaded to your device. If you have the agent installed, you can check this ID with the simple command wott-agent whoami. When you have the agent, WoTT will fetch certificates to your device (and these are updated every 7 days. You can check the status of this on your dashboard).
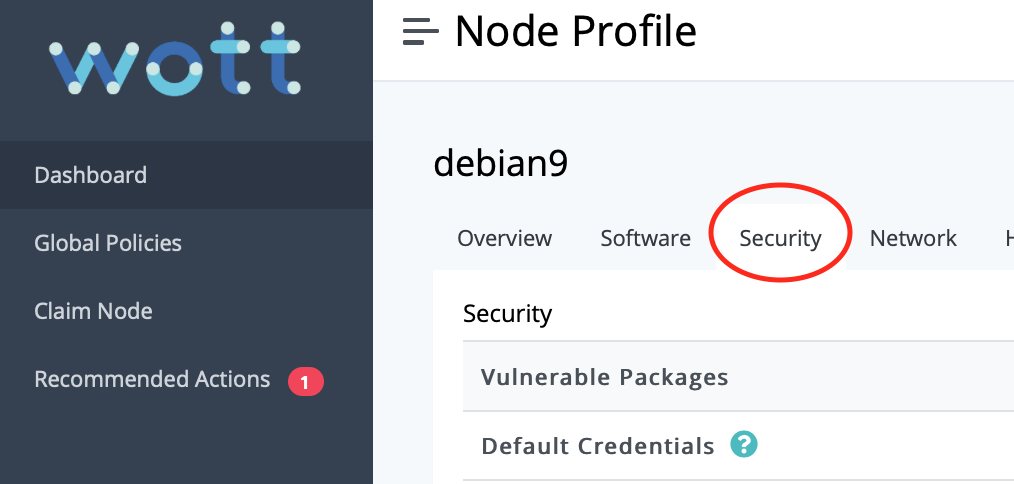
scroll down the security tab to see.
On your node itself, WoTT will have downloaded 4 files.
ca.crt
client.crt
client.key
combined.pem
The ca.crt is the root certificate that is fetched from WoTT. This is what is used to validate your client.crt (which contains the device’s public key). The other two files contain your private keys and should never leave the device.
Why you should care?
For a start, it’s probably the most common thing used since SSL became outdated. Several companies use mTLS. For example Skype uses it to secure business servers; and Cloudflare is a large provider of PKI for mTLS. It’s particularly important in cases where you want encrypted, secure traffic in both directions. Many devices now do not use logins (such as IoT devices) meaning that they would either be blocked from accessing a resource, or access a resource insecurely. Additionally, not using TLS or similar encryption tools without authentication can lead to ‘man in the middle attacks.’ Using mTLS is a way to provide an identity to a device/server that can be cryptographically verified. In other words, it’s a way of making your resources more flexible and available whilst still being secure through authentication.
It’s also a good way for you to secure yourself if you intend on being a server provider. Much of how internet security is done currently is verifying a server from a given client, it’s a lot harder to protect yourself as the server. Usernames and passwords are an option, but they are exploitable and unreliable. More and more there is a need to move away from such technologies and start using cryptographic signage to identify trustworthy devices. Of course, no technology is perfect. TLS is updated frequently to counter this and it is the developer’s responsibility to choose trusted CAs. For now, mTLS is a strong, lightweight method of securing your server and client endpoints.
Conclusions
To summarise, mTLS is just a modified version of TLS (Transport Layer Security). It uses the same protocols and technologies, it’s just a two-way verification instead of one (for example accessing a https link is simple TLS security). However, it is vital to support your TLS structure with a PKI backend in order to make your product scalable and safe.
mTLS is the best option we have currently to protect servers from fraudulent devices and is an absolute must when dealing with certain tech domains like IoT. Many IoT breaches to date have been due to unencrypted traffic that doesn’t protect the server (and leads to entire networks being brought down). There’s also no real excuse not to implement it. All you need is a private CA and here at WoTT we provide that for you as well as other features to help you manage and keep track of your devices. For example, you can control through our agent which device certificates you want to trust on individual endpoints giving you the freedom to make your server as flexible or secure as you need. Our agent gives you a high level view and capabilities to manage your devices in a user-friendly and visual way.
If you’re not quite ready to move to mTLS fully, let’s at least make sure you’ve secured your devices to the best of your ability. Why not do a CVE scan while you’re here to get a feel for how secure your endpoints actually are. WoTT is lightweight and can be installed on a variety of linux based devices from servers to raspberry pis. Until then, feel free to familiarise yourself with our agent and mTLS examples.
And while you're here...
Did you know that WoTT gives you free security audits, including CVE scanning, for your first node? Sign up today.